Google Sheets integration

Learn how to read and write data to and from Google Sheets.

Save form responses in Google Sheets

Follow the steps below to save blocks.md form responses in your Google Sheets. Let's use the following example:

>> post

email* = EmailInput(
  | question = What is your email address?
  | description =
    Please enter an email address where we can reach you
    for a reply. Make sure to avoid spelling mistakes.
)

---
products* = PictureChoice(
  | question = What products would you like?
  | choices =
    T-Shirts && https://res.cloudinary.com/dnriuttuy/image/upload/v1720015194/tshirts.png,
    Socks && https://res.cloudinary.com/dnriuttuy/image/upload/v1720015163/socks.png
  | multiple
)

---
budget* = NumberInput(
  | question = What is your budget?
  | unitEnd = $
)

So we have three fields: email, products, and budget. Please note, the >> post will partially submit the form after the first slide (so that the email is captured immediately).

0. Quick video guide

Here's a quick video guide if you don't feel like reading:

1. Set up a Google Sheet

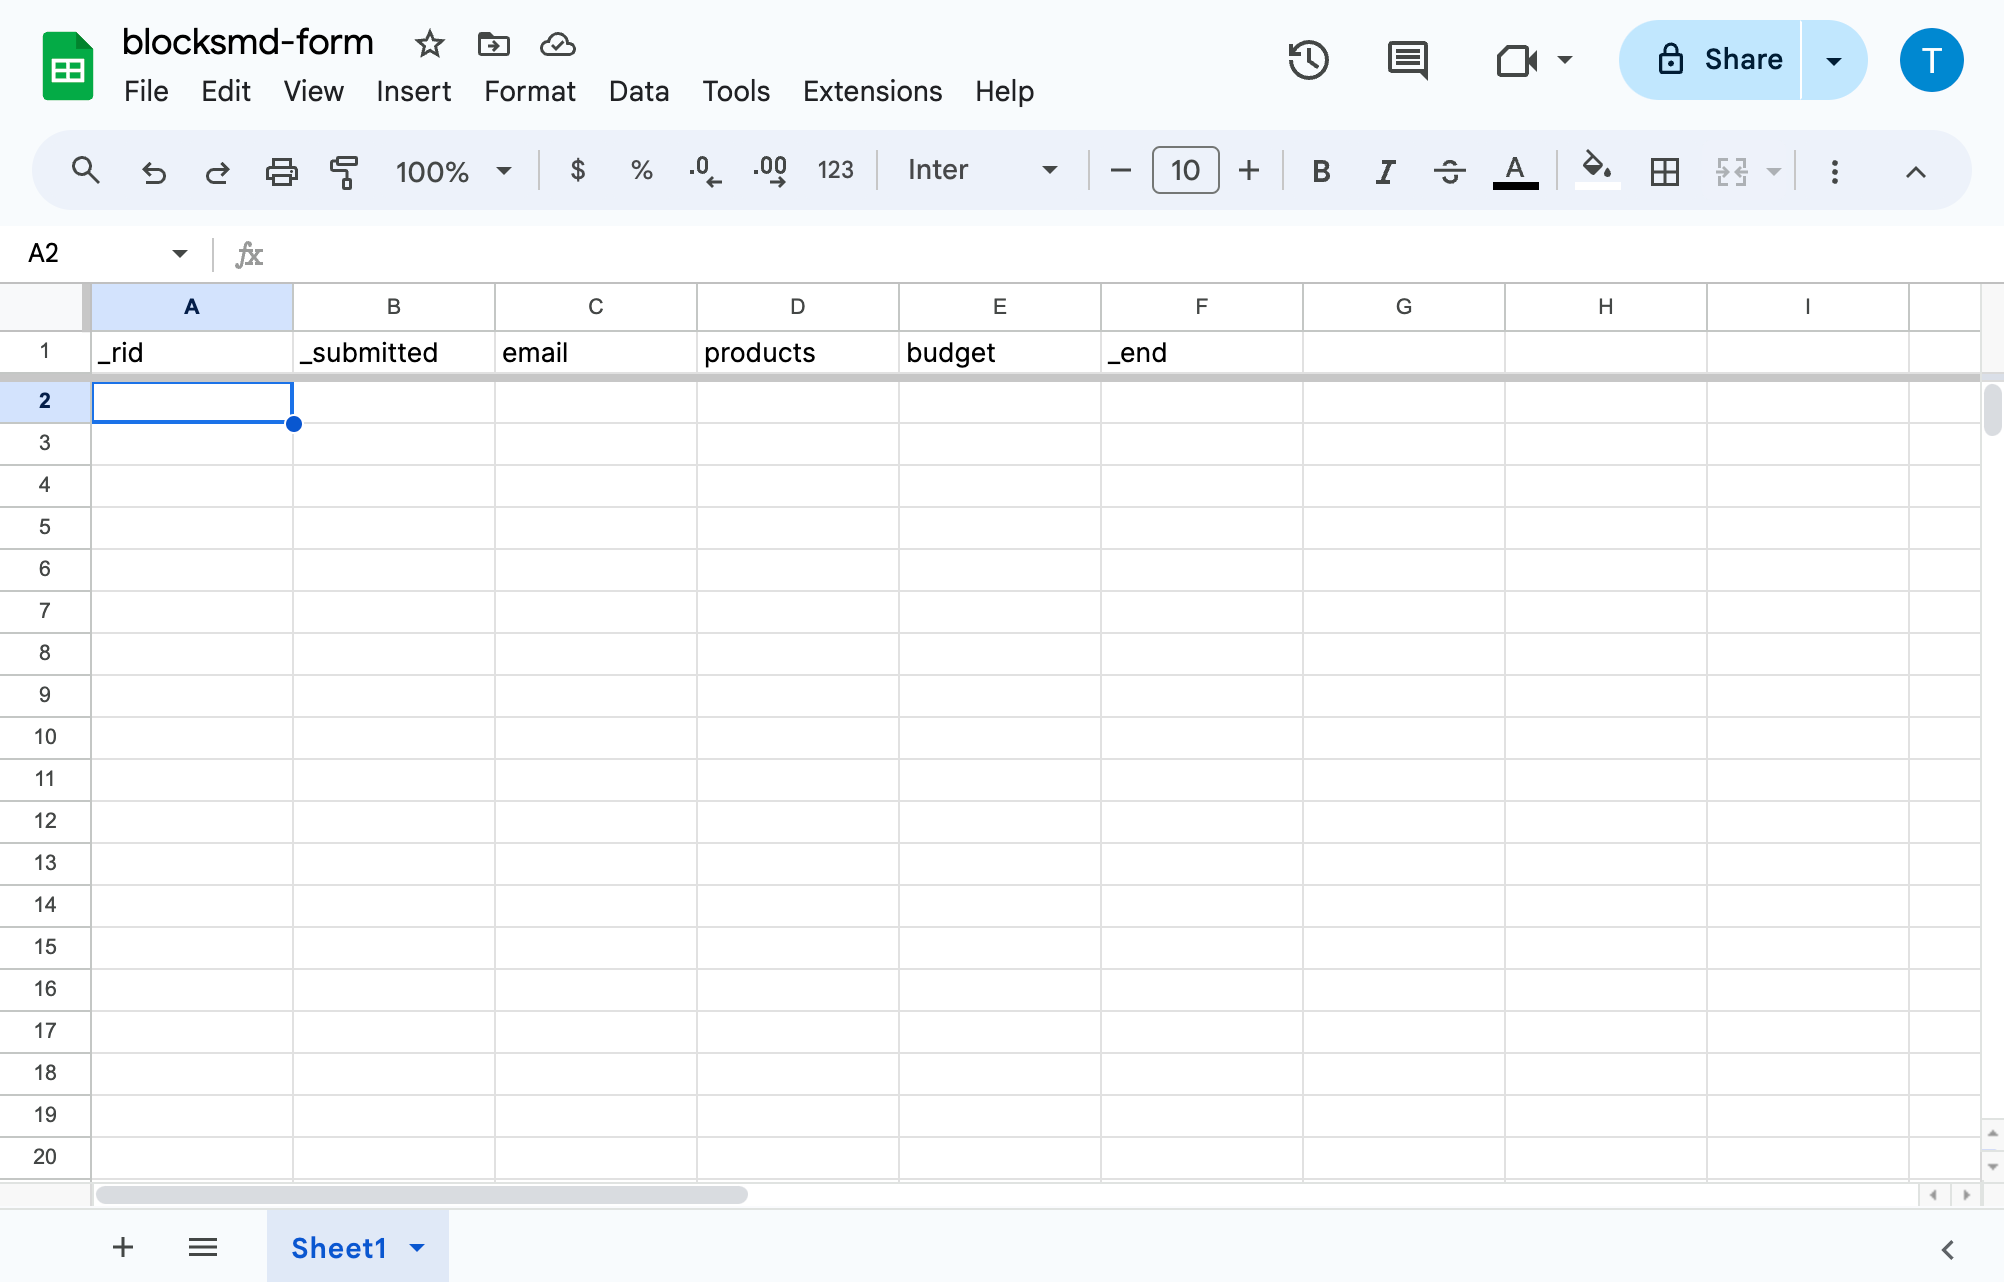
The first step is to set up a Google Sheet so that the first row (headers) match the names of the form fields you want to save.

There are three other fields which are sent automatically:

  • _rid—unique ID of the response

  • _submitted—date and time when the response is submitted

  • _end—whether or not the user has reached the end or not (in case of partial submissions, this will not be TRUE)

2. Create a Google App Script

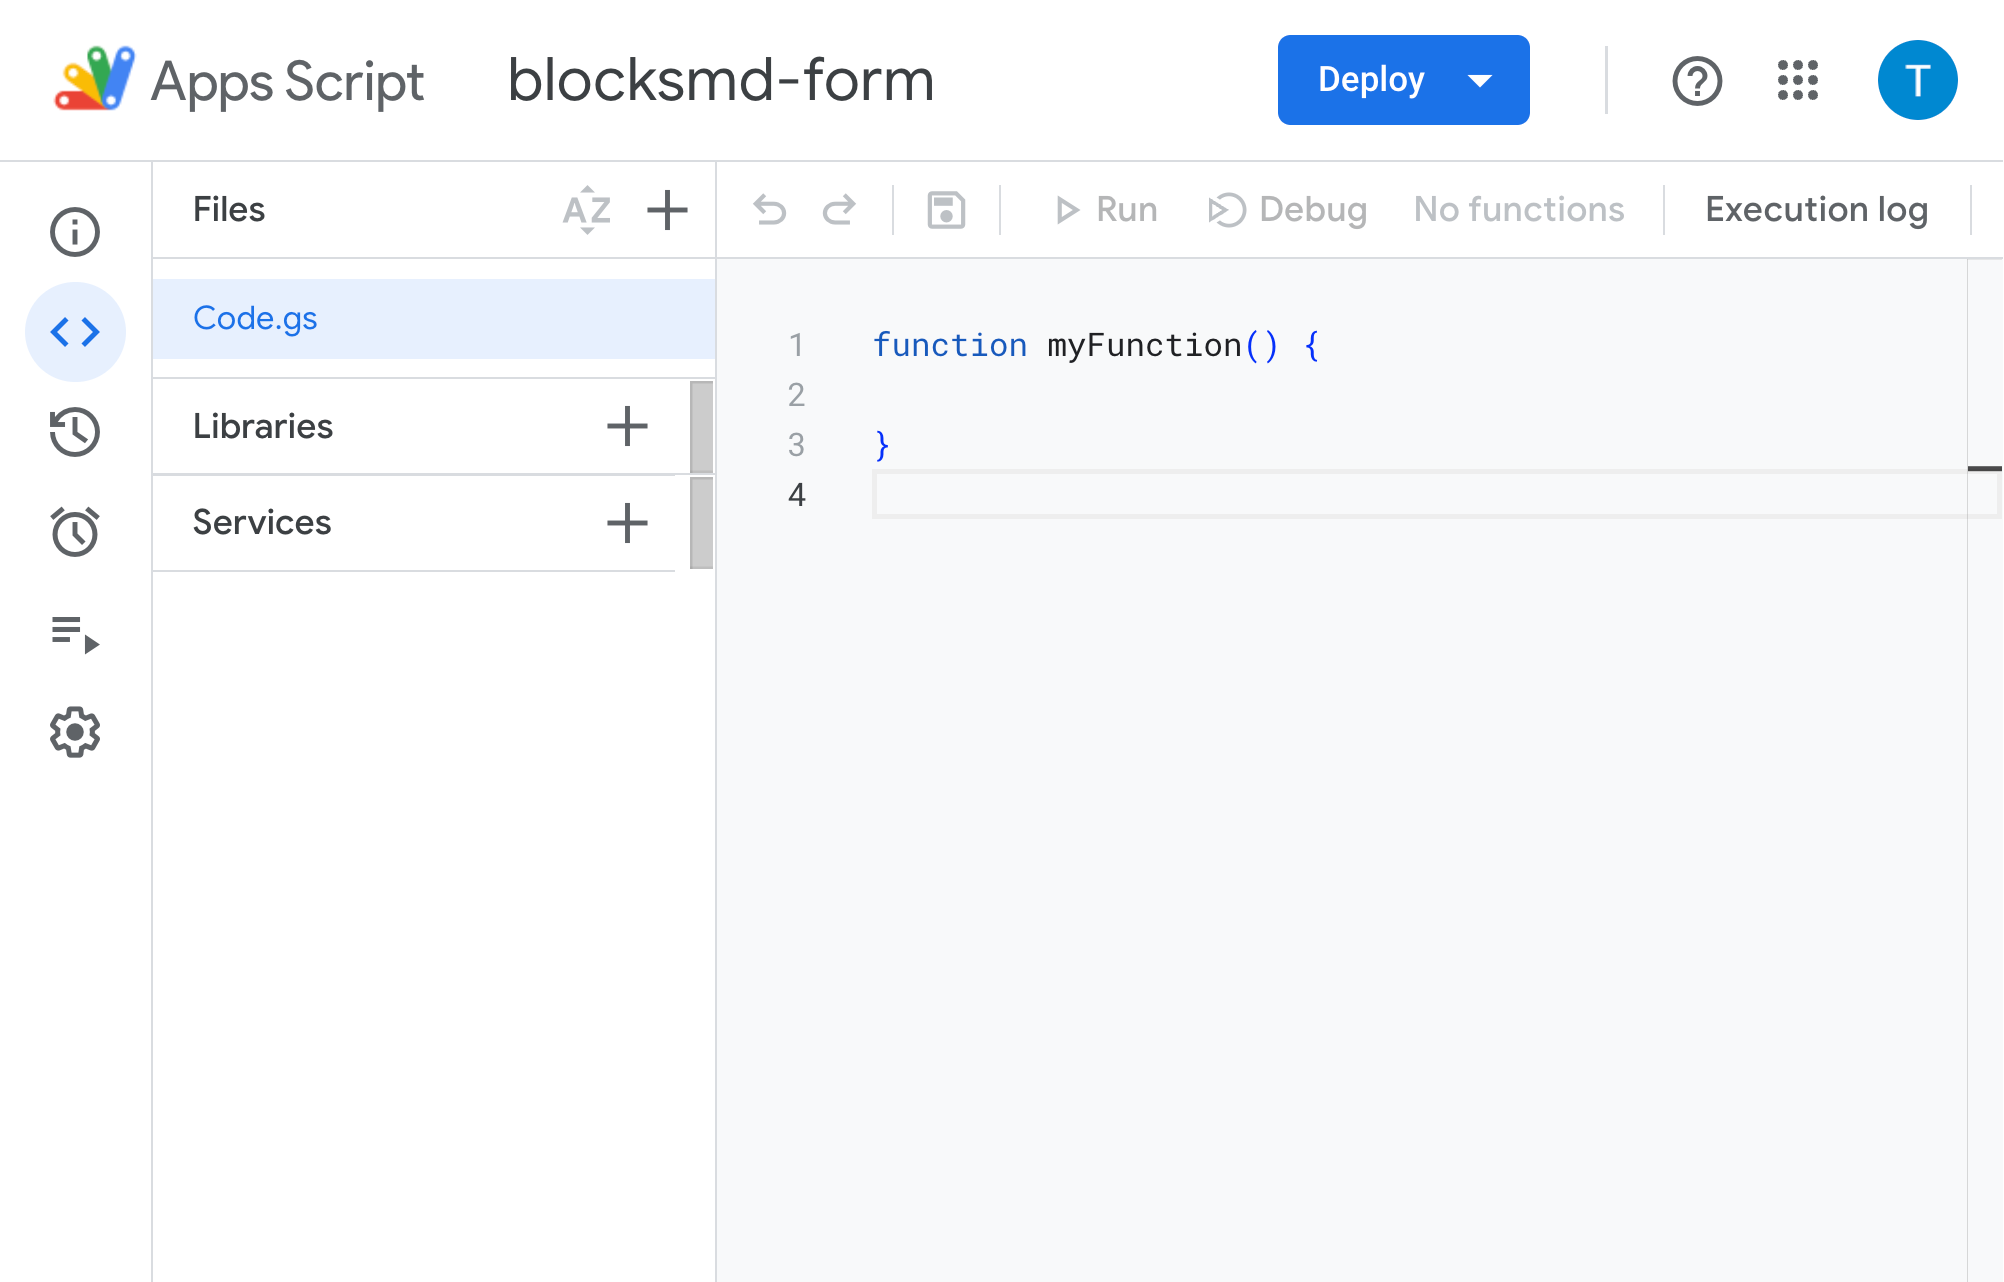
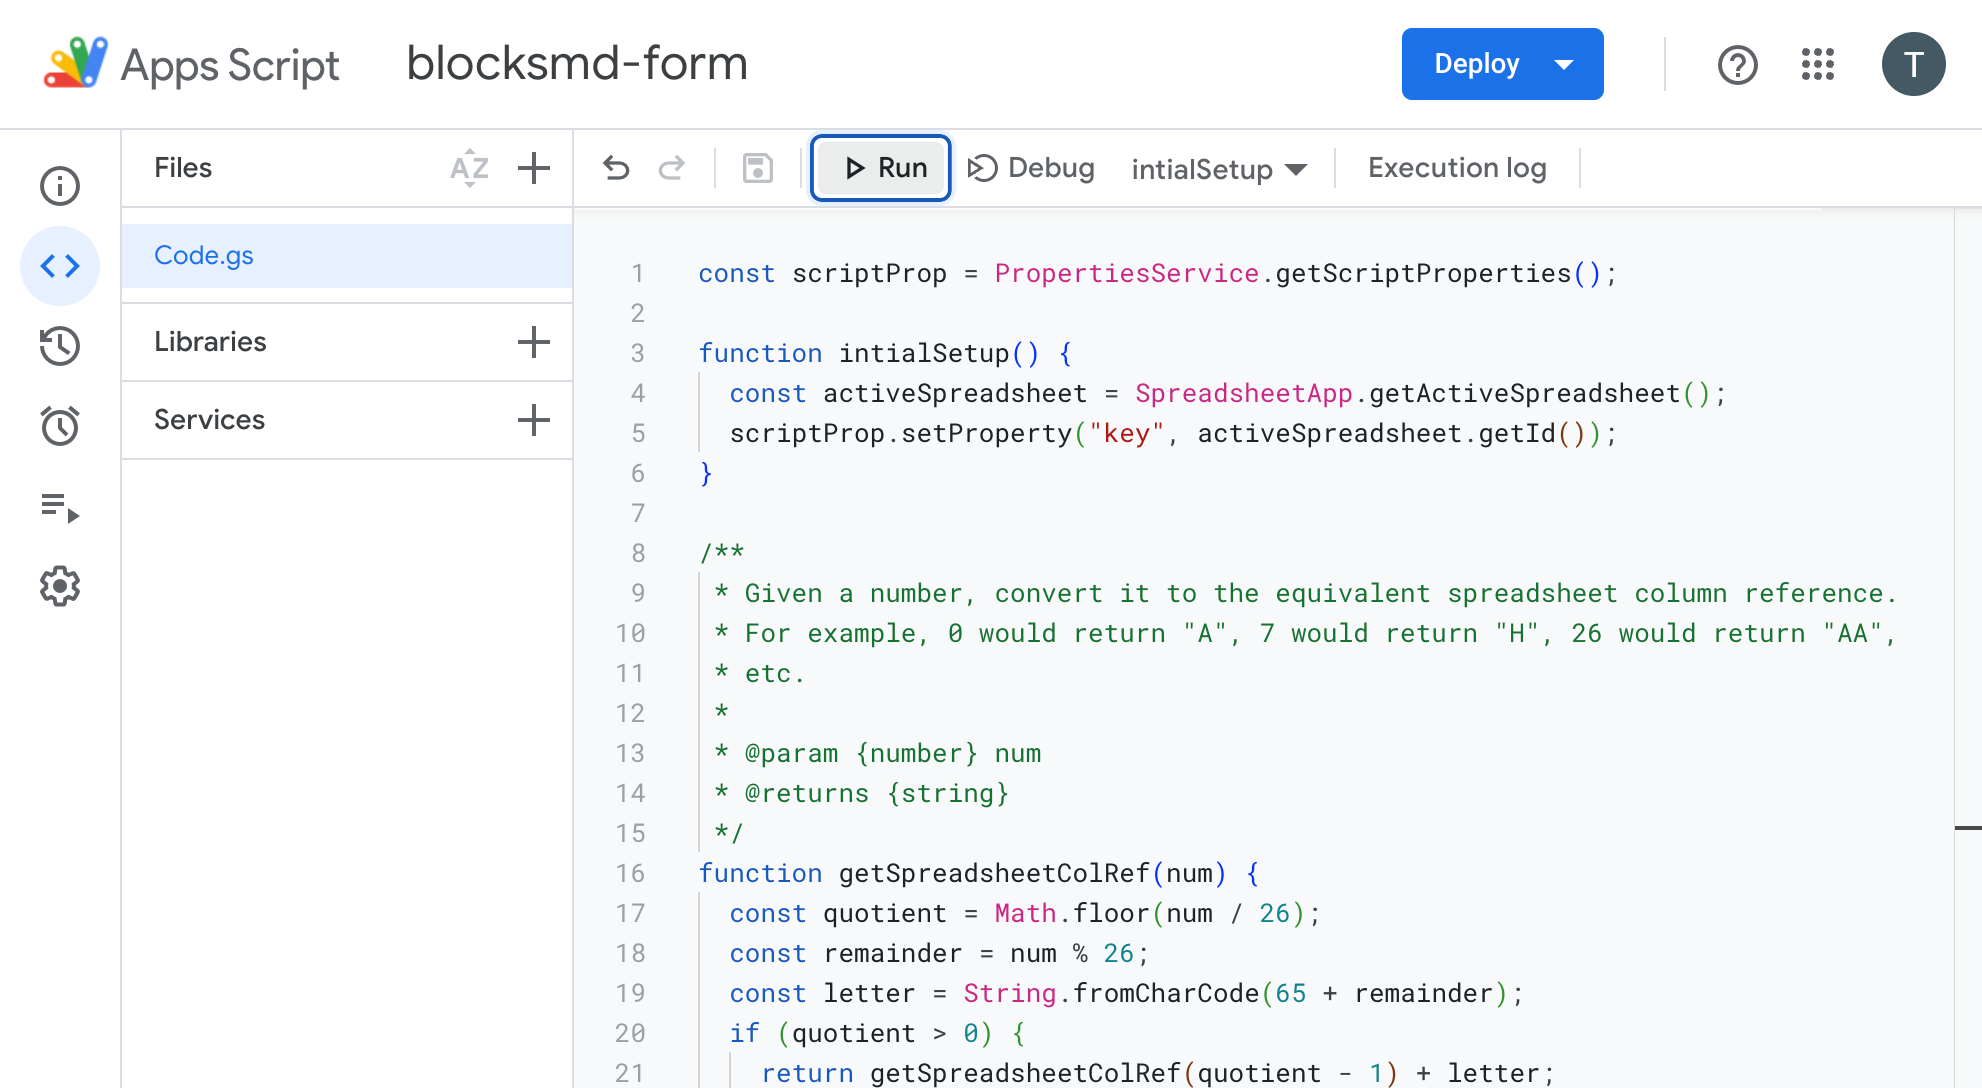
Click on Extensions -> Apps Script. This will open a new Google Script. Rename it to something like blocksmd-form.

Replace the myFunction() { ... } section with the following:

const scriptProp = PropertiesService.getScriptProperties();

function intialSetup() {
  const activeSpreadsheet = SpreadsheetApp.getActiveSpreadsheet();
  scriptProp.setProperty("key", activeSpreadsheet.getId());
}

/**
 * Given a number, convert it to the equivalent spreadsheet column reference.
 * For example, 0 would return "A", 7 would return "H", 26 would return "AA",
 * etc.
 *
 * @param {number} num
 * @returns {string}
 */
function getSpreadsheetColRef(num) {
  const quotient = Math.floor(num / 26);
  const remainder = num % 26;
  const letter = String.fromCharCode(65 + remainder);
  if (quotient > 0) {
    return getSpreadsheetColRef(quotient - 1) + letter;
  } else {
    return letter;
  }
}

function doPost(e) {
  const lock = LockService.getScriptLock();
  lock.tryLock(10000);

  try {
    // Parse the data from the request
    const data = JSON.parse(e.postData.contents);

    // Get the sheet using the name
    // If the sheet name is not provided, get the first sheet of the document
    const doc = SpreadsheetApp.openById(scriptProp.getProperty("key"));
    const sheet = doc.getSheetByName(data["_sheetName"]) || doc.getSheets()[0];

    // Set up the column references
    // This contains the column numbers for the headers (first row)
    const colRefs = {};
    const firstRow = sheet
      .getRange(1, 1, 1, sheet.getLastColumn())
      .getValues()[0];
    for (let i = 0; i < firstRow.length; i++) {
      const colName = firstRow[i];
      colRefs[colName] = i + 1;
    }

    // Get the row number to insert the request data
    // By default, this is the last row
    // If the incoming request has an "_rid" that matches an existing row,
    // then that row is used for the insert
    let rowToInsert = sheet.getLastRow() + 1;
    const _ridCol = colRefs["_rid"] || false;
    if (_ridCol) {
      const _ridColLetter = getSpreadsheetColRef(_ridCol - 1);
      const _ridValues = sheet
        .getRange(`${_ridColLetter}:${_ridColLetter}`)
        .getValues();
      for (let i = 0; i < _ridValues.length; i++) {
        if (data["_rid"] === String(_ridValues[i])) {
          rowToInsert = i + 1;
        }
      }
    }

    // Insert
    // Make sure to remove all formulae (starts with "=")
    for (let [key, value] of Object.entries(data)) {
      const colRef = colRefs[key] || false;
      if (colRef) {
        if (typeof value === "string") {
          value = value.trim();
          if (value.startsWith("=")) value = `[${value}]`;
        } else if (Array.isArray(value)) {
          value = value.join(", ");
        }
        sheet.getRange(rowToInsert, colRef).setValue(value);
      }
    }

    // Return ok
    return ContentService.createTextOutput(
      JSON.stringify({ ok: true }),
    ).setMimeType(ContentService.MimeType.JSON);
  } catch (e) {
    // Return not ok
    return ContentService.createTextOutput(
      JSON.stringify({ ok: false }),
    ).setMimeType(ContentService.MimeType.JSON);
  } finally {
    lock.releaseLock();
  }
}

Save the project before moving to the next step.

3. Deploy the project

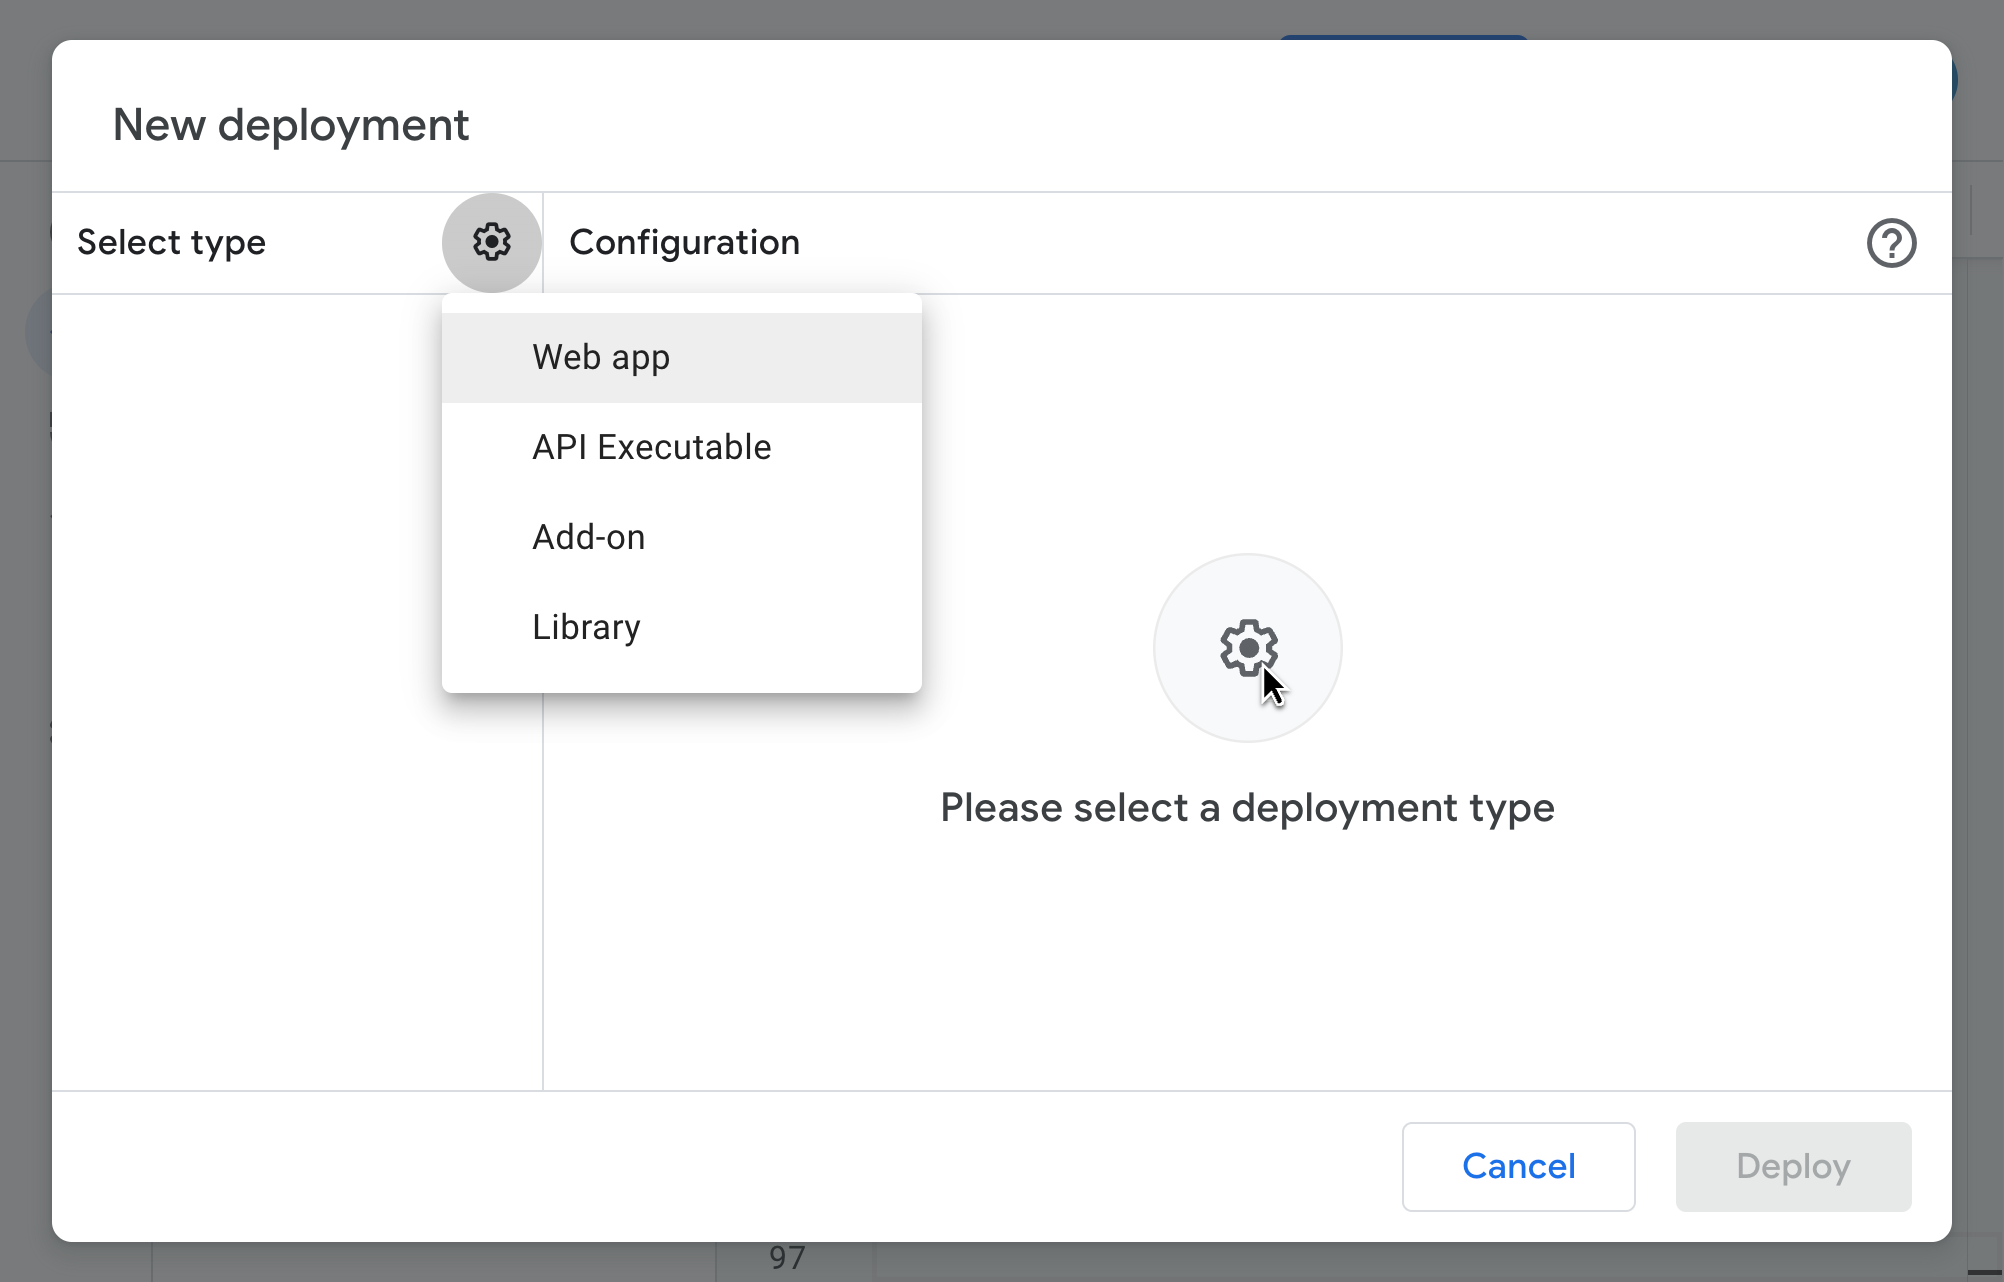
Click on the Deploy -> New Deployment button on the top right corner of the screen. A modal will open up. Select Web app from the dropdown (open the dropdown by clicking on the settings icon on the left hand side).

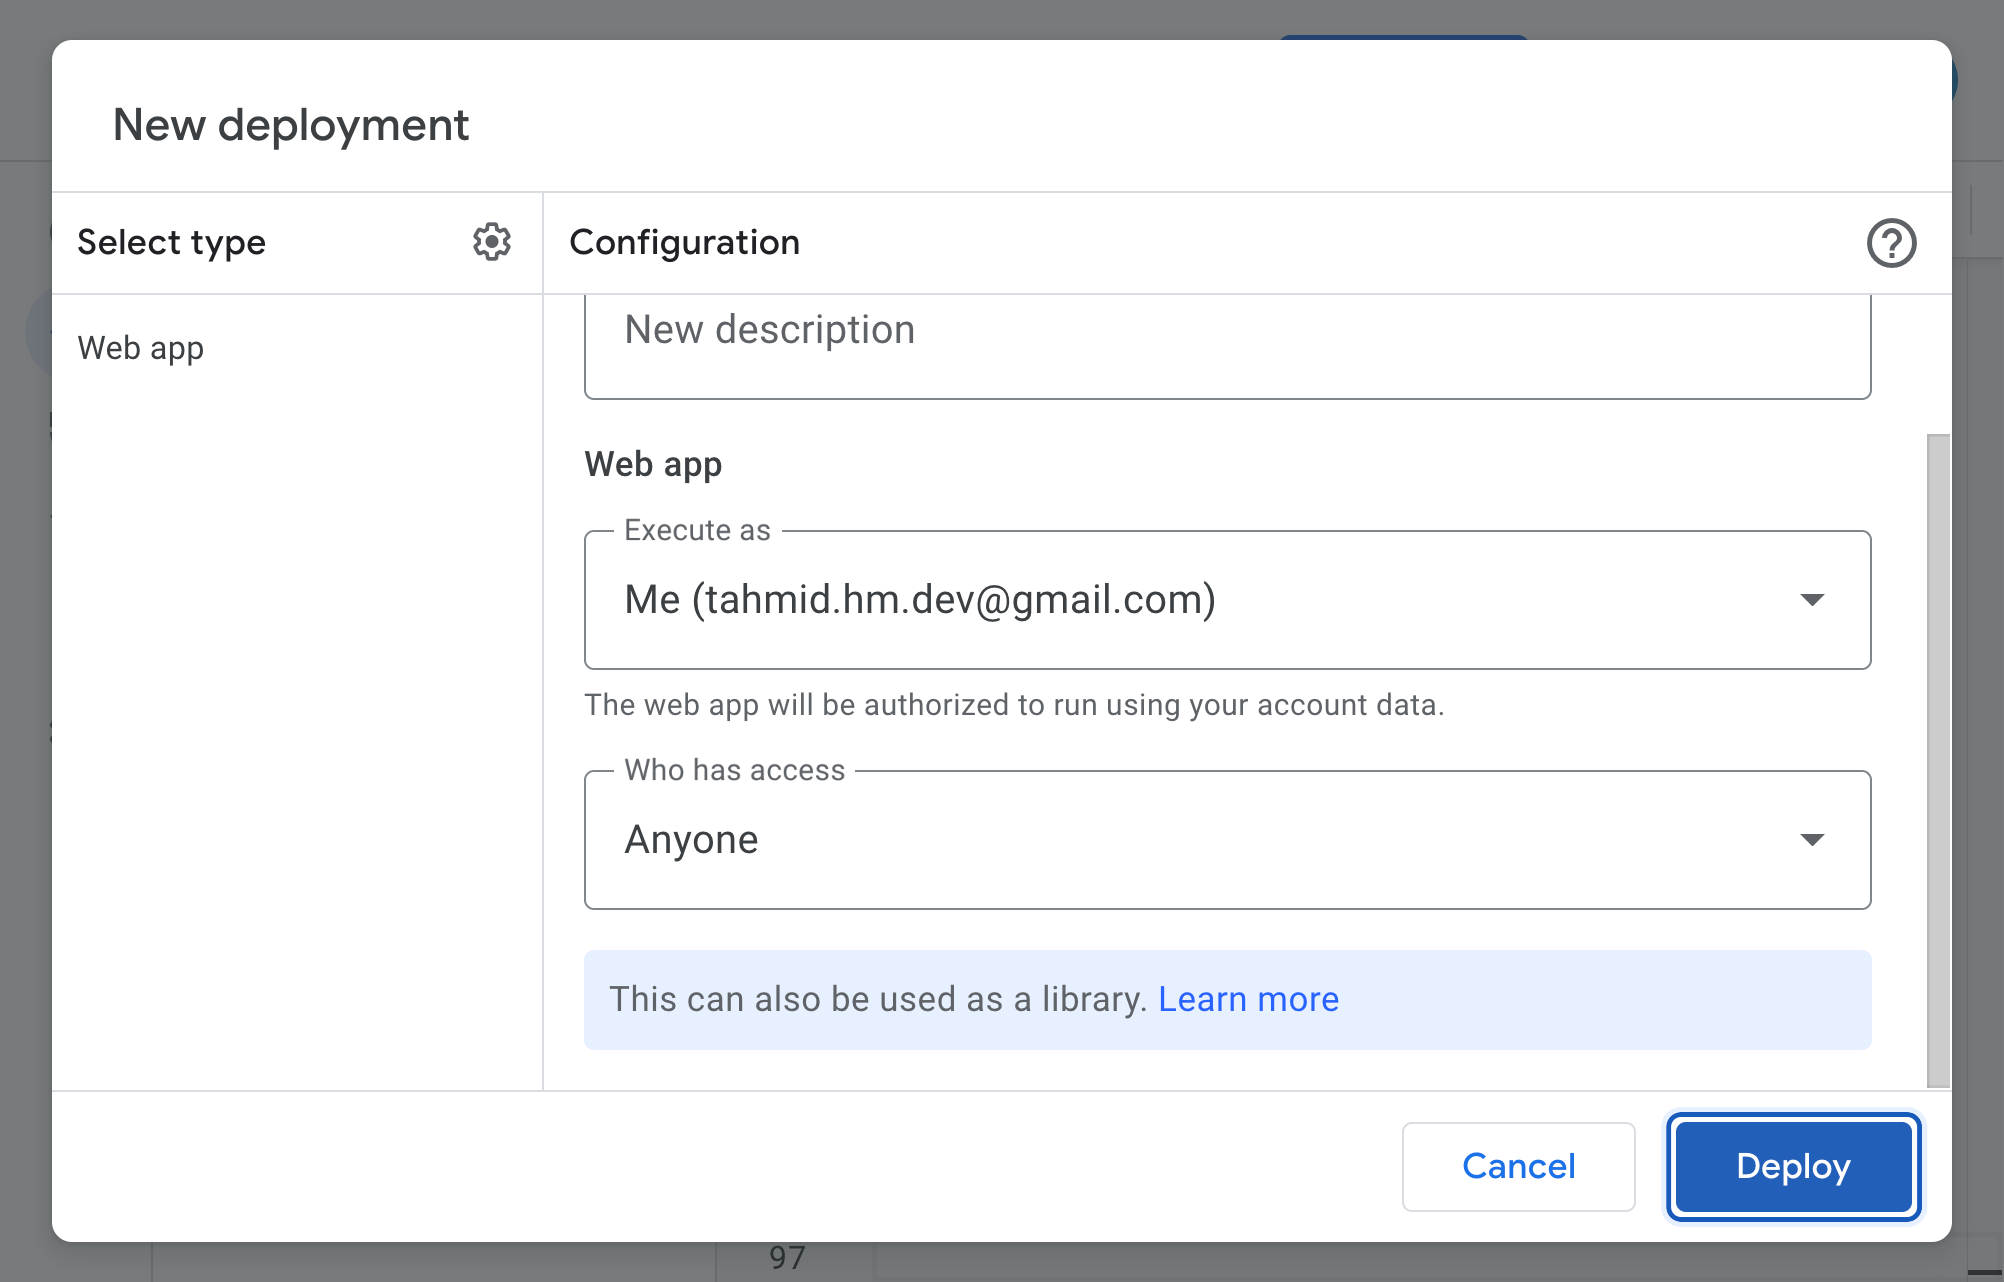
On the next screen, select the following options:

  • Web app → Execute As: Me

  • Web app → Who has access: Anyone

After that, click on Deploy.

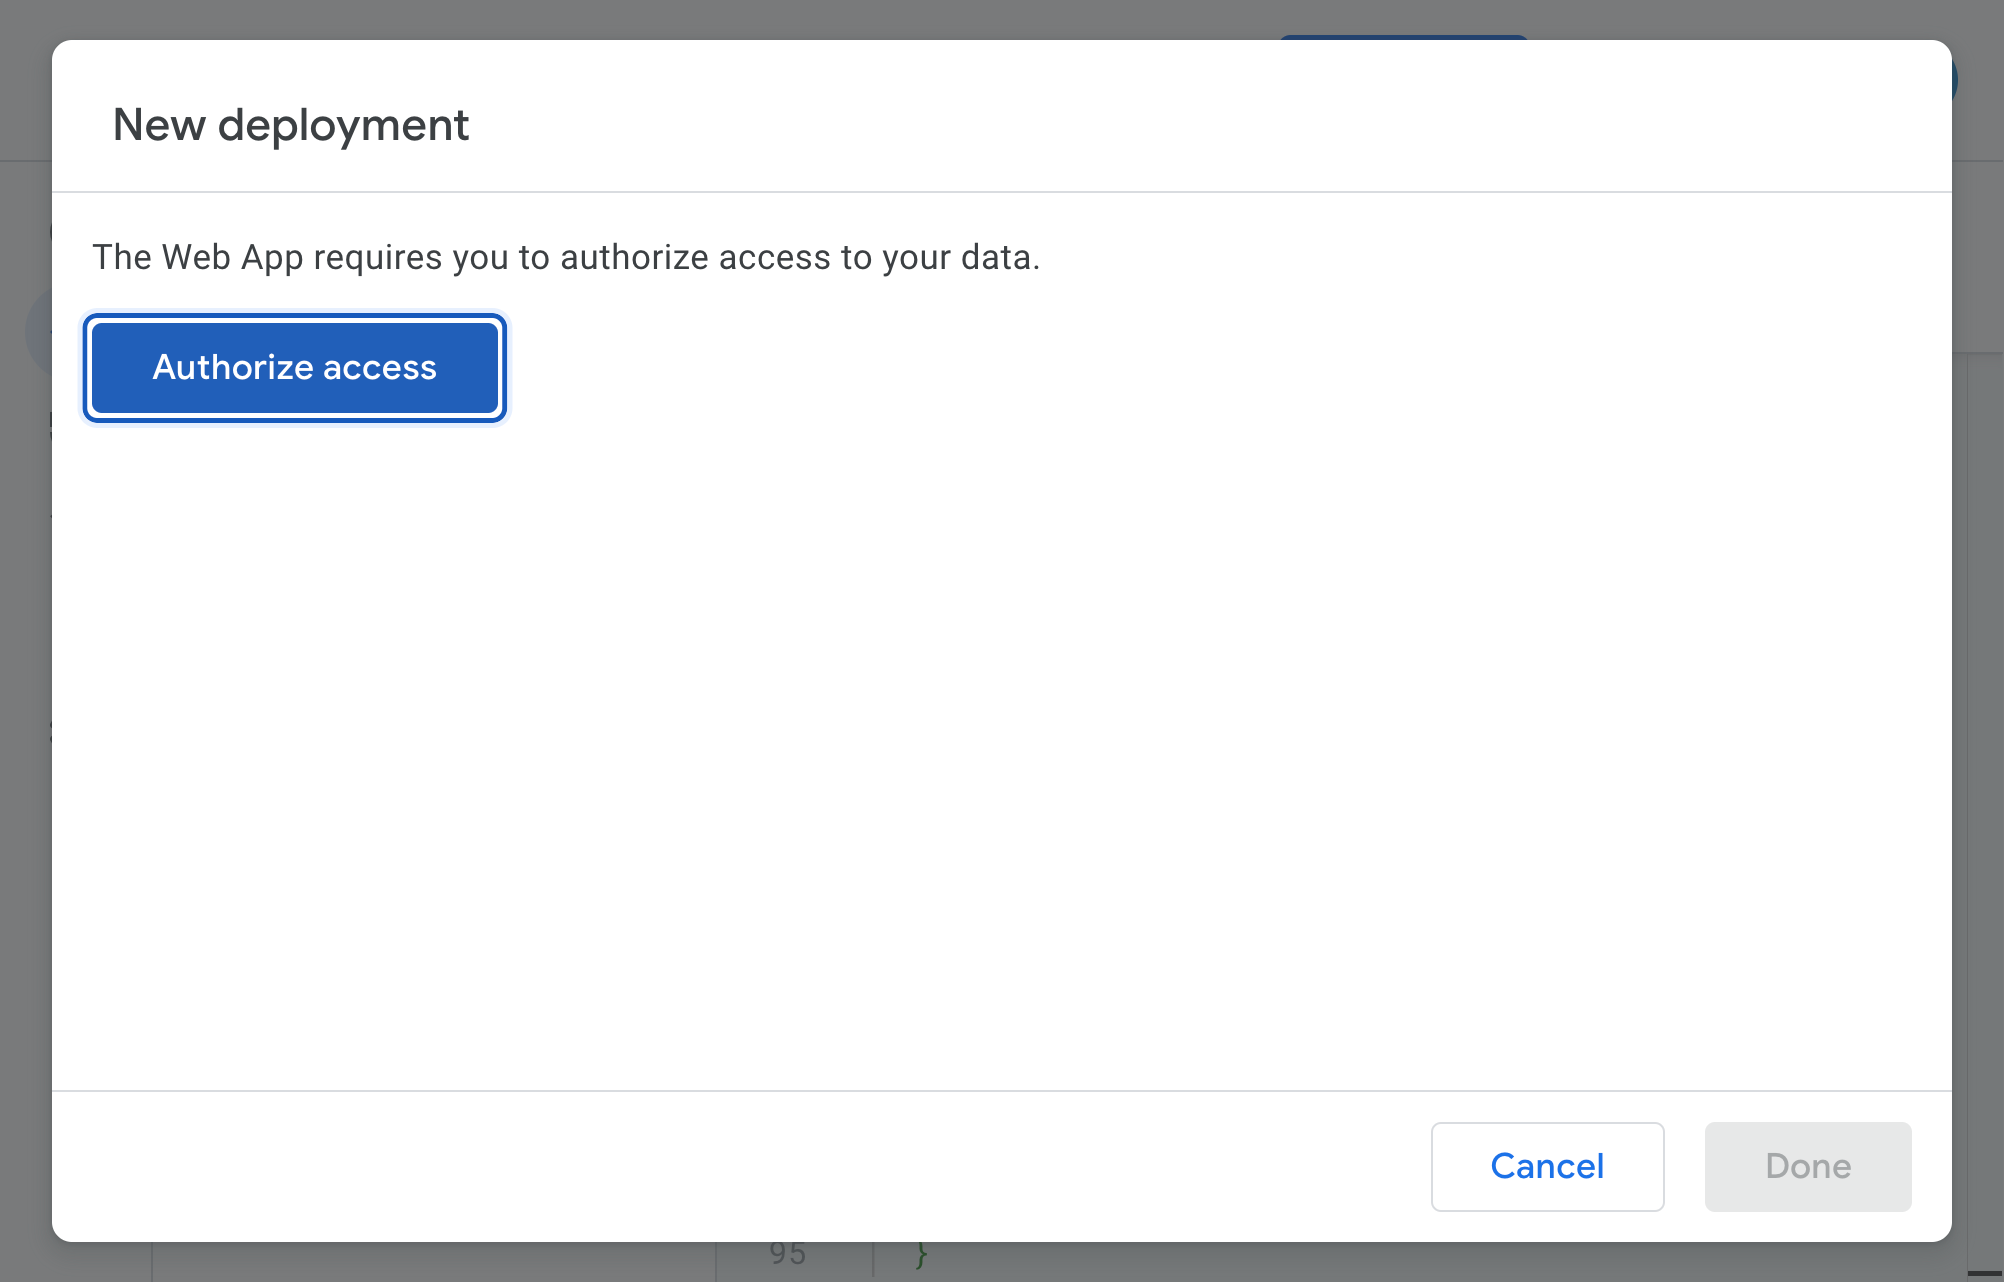
On the next screen, you will need to give the project the proper permissions by clicking on the Authorize access button.

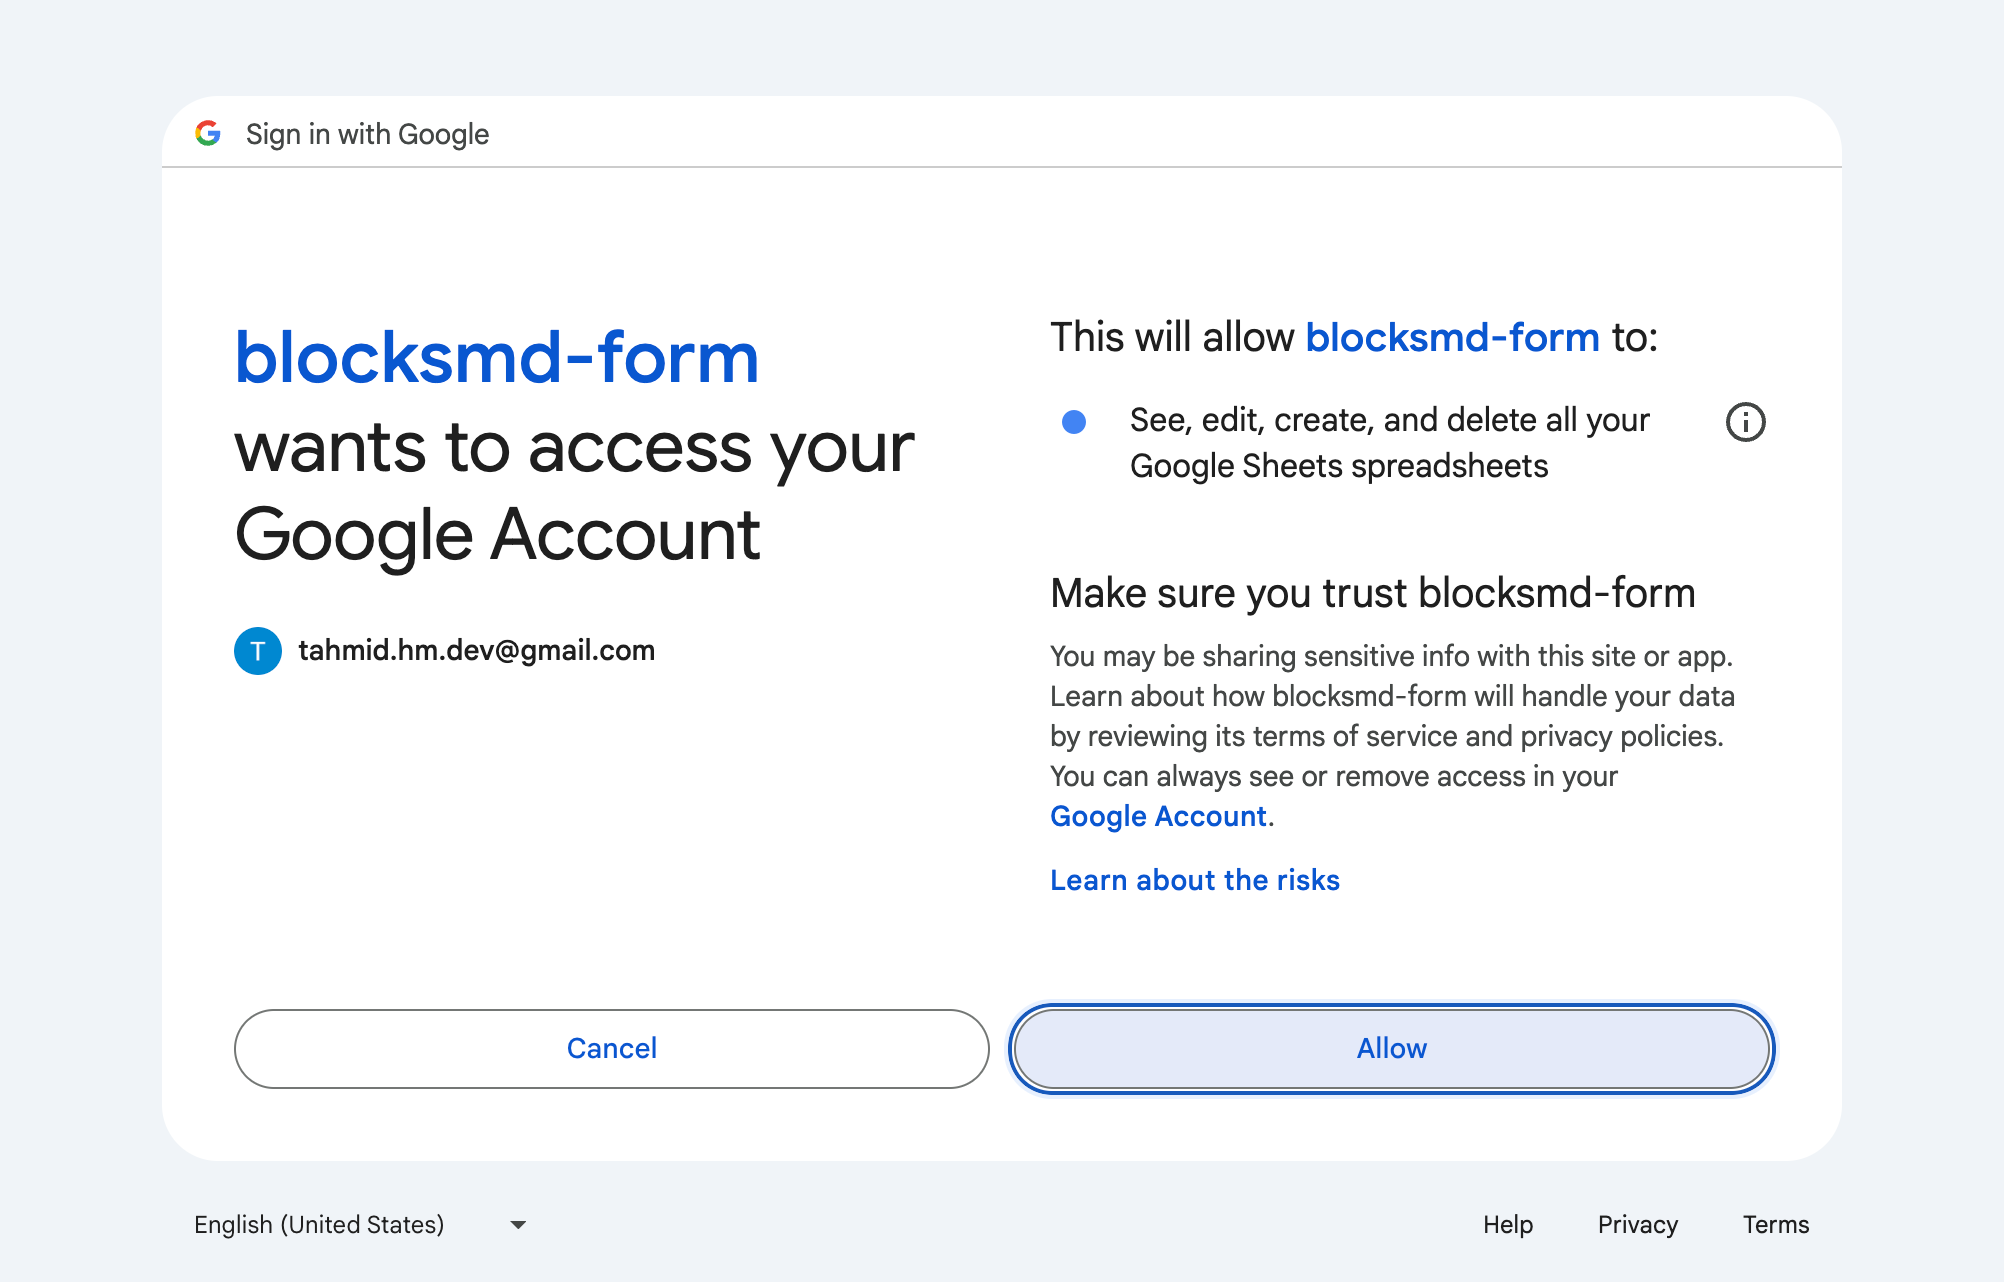
Another pop-up will open up on the screen. Select the correct Google account (the one you used to create the Google Sheet and App Script).

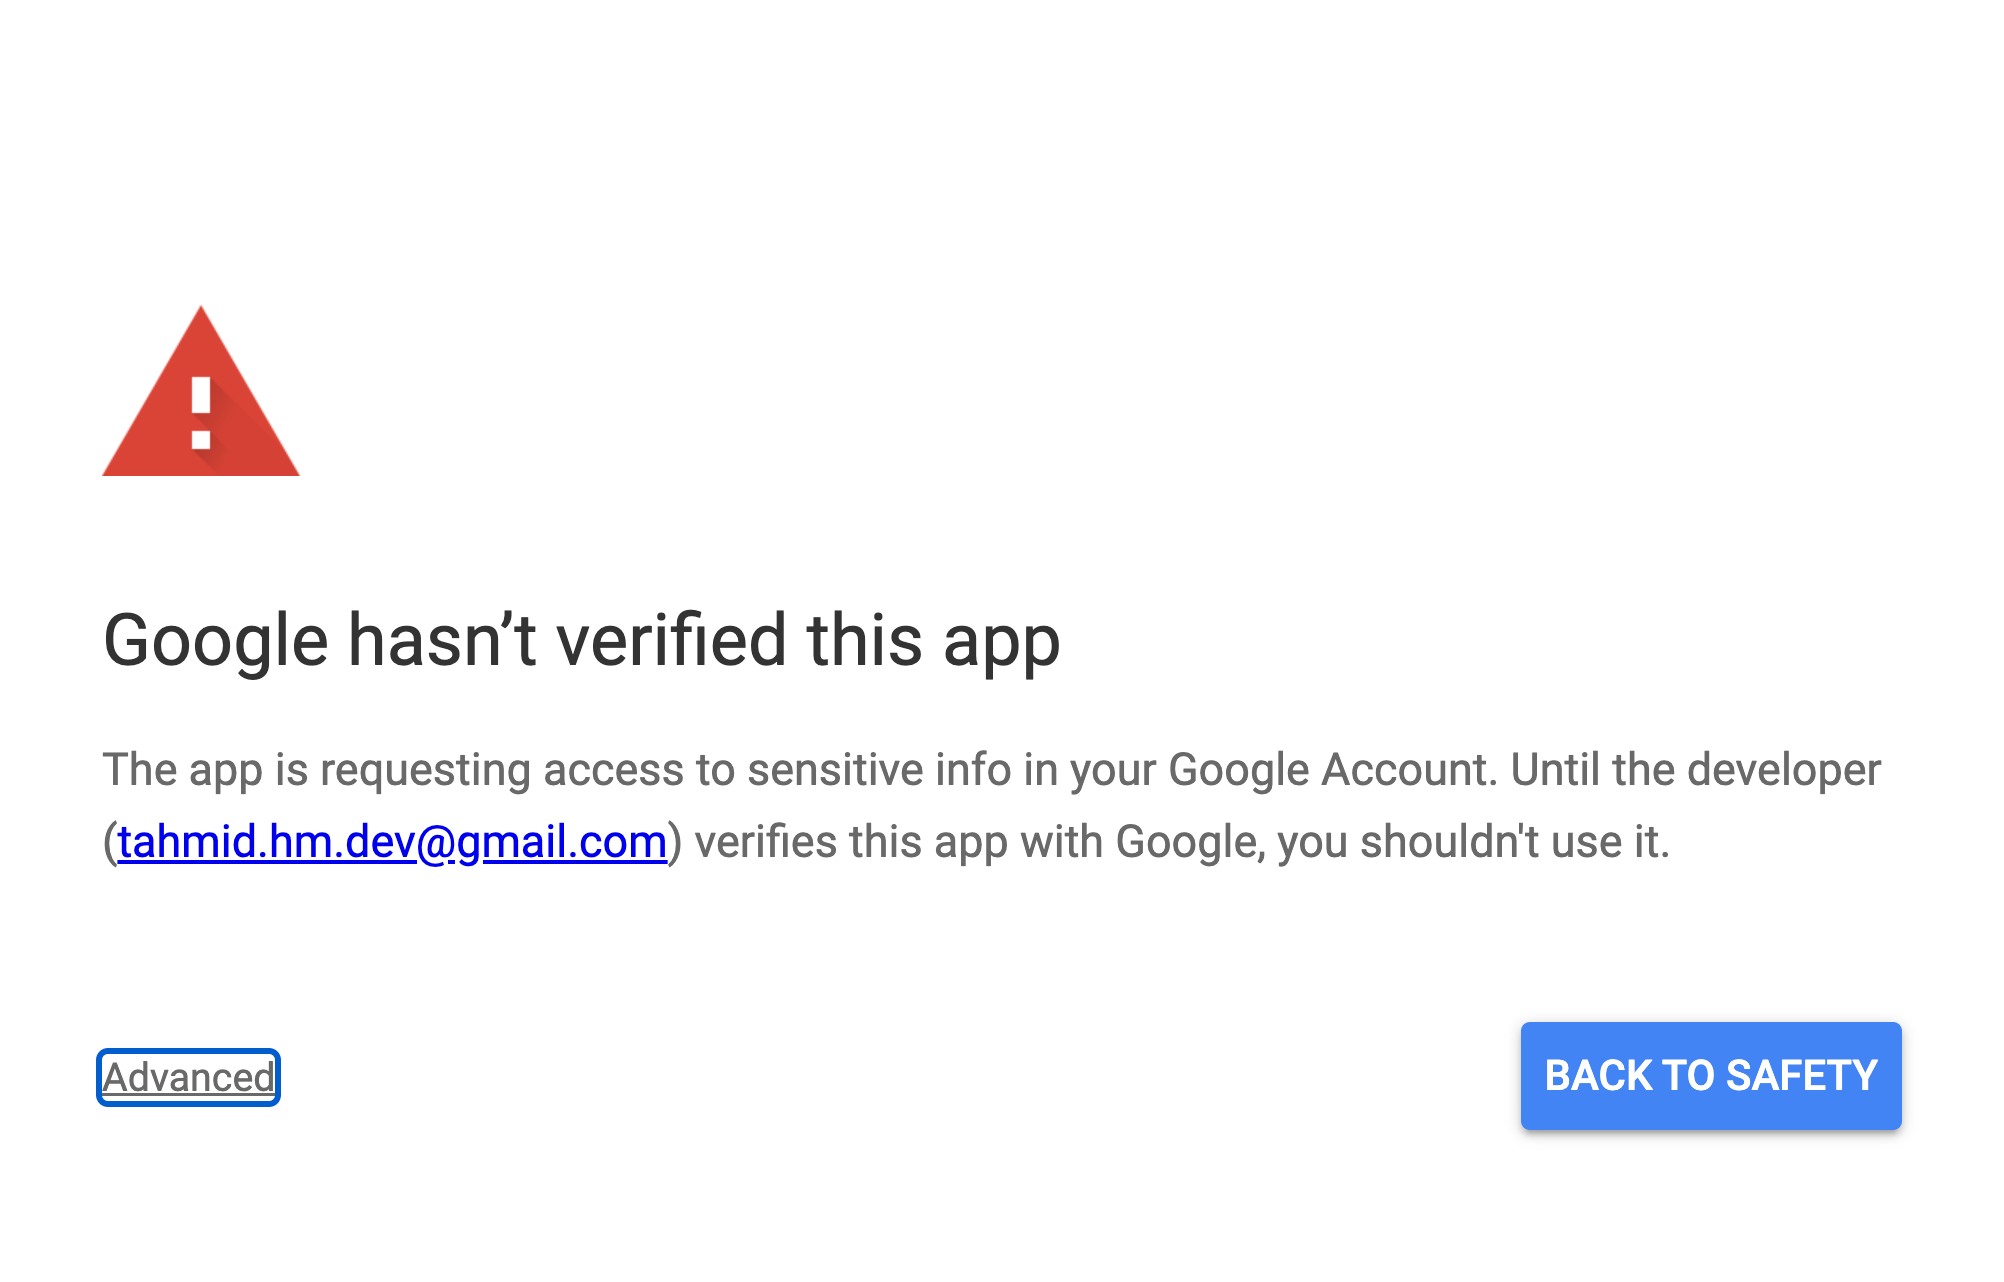
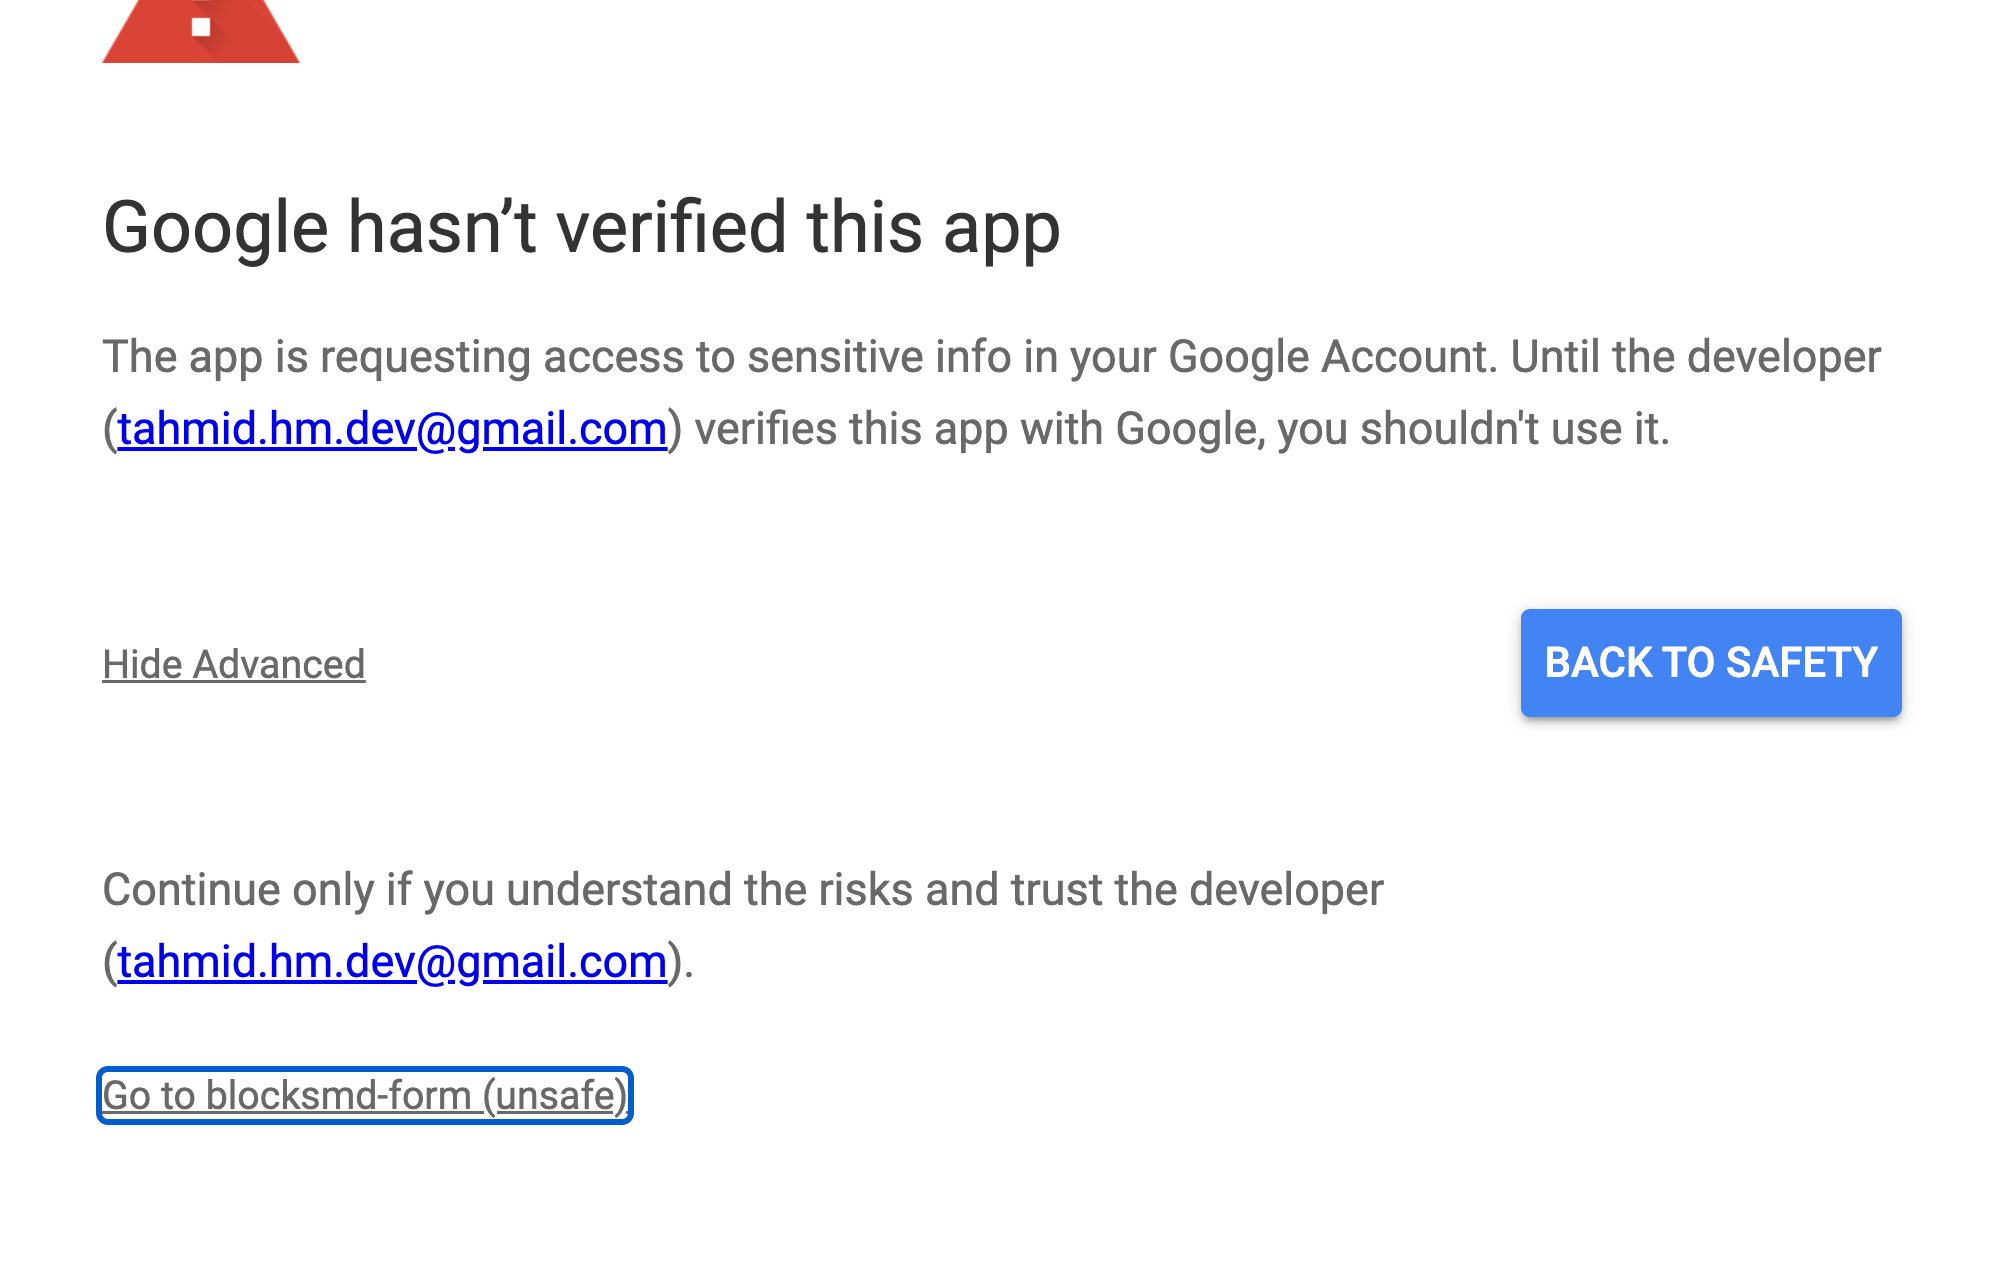
The next screen will generate a warning before you can continue. This is actually totally safe because you know exactly what code you're running. You must click on Advanced -> Go to blocksmd-form (Unsafe) for the script to have the correct permissions.

On the next screen, click on the Allow button to give the project the required permissions.

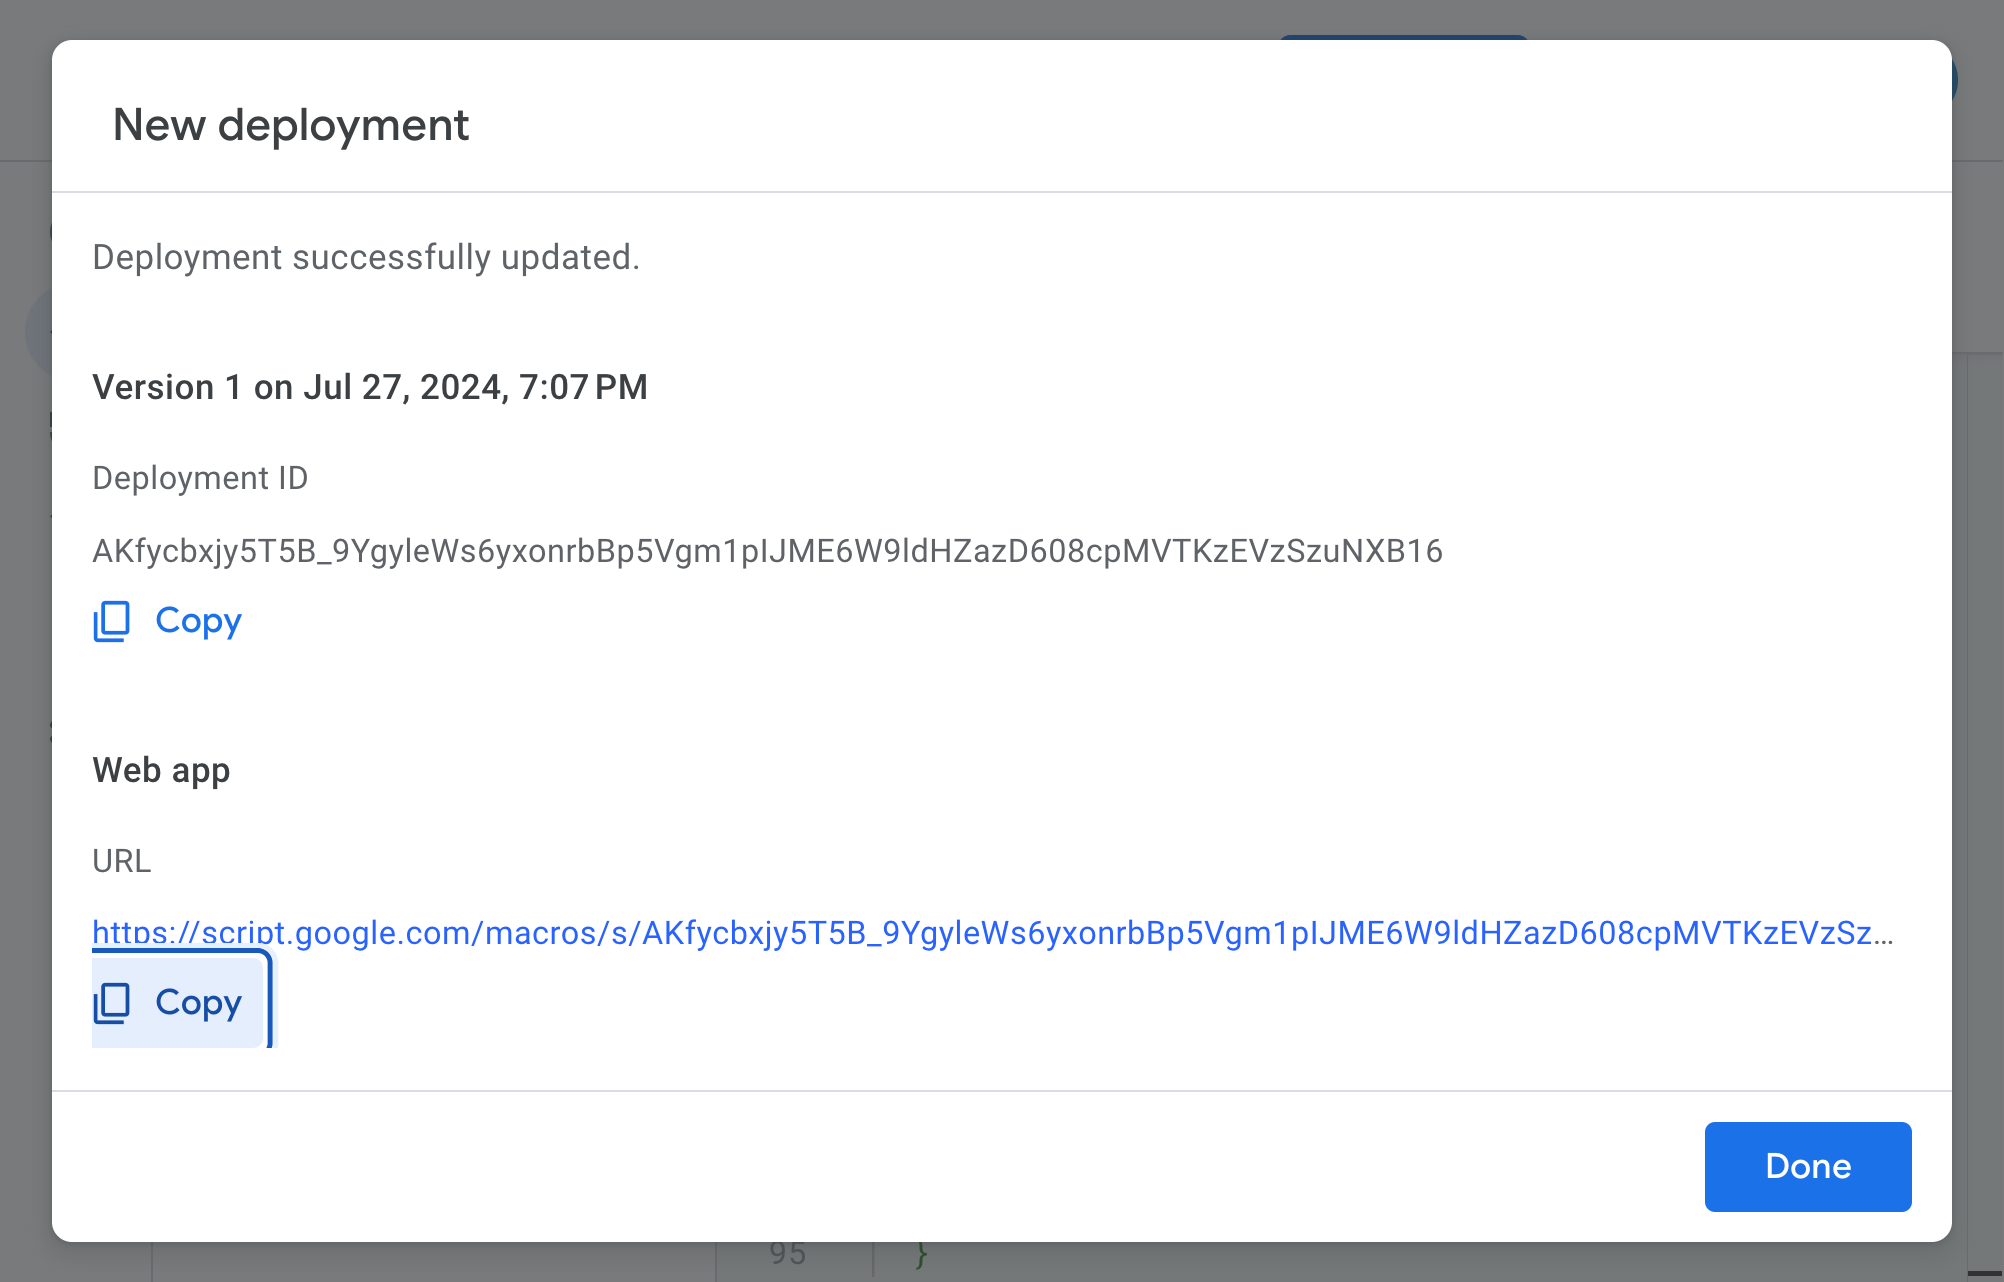
You should see a successful deployment. Copy the Web app URL from this screen and keep it with you. We need to add it as a setting to our form.

4. Run the initialSetup() function

After the deployment, close the modal. Next, you need to run the initialSetup() function by clicking on the Run button. Make sure this function is the one selected.

Please note, at this point, you may need to Review permissions again. In that case, follow the steps as above:

  1. Select correct Google account

  2. Advanced -> Go to blocksmd-form (Unsafe)

  3. Click on Allow button

5. Add the Web app URL as a setting

Finally, set the URL you copied from the deployment modal as the value for the post-url setting:

#! post-url = {url}
>> post

email* = EmailInput(
  | question = What is your email address?
  | description =
    Please enter an email address where we can reach you
    for a reply. Make sure to avoid spelling mistakes.
)

---
products* = PictureChoice(
  | question = What products would you like?
  | choices =
    T-Shirts && https://res.cloudinary.com/dnriuttuy/image/upload/v1720015194/tshirts.png,
    Socks && https://res.cloudinary.com/dnriuttuy/image/upload/v1720015163/socks.png
  | multiple
)

---
budget* = NumberInput(
  | question = What is your budget?
  | unitEnd = $
)

And that's it. You should be able to save your form responses directly in your Google Sheet now!

6. See the form in action

Here's a video of the form in action:

7. Change the sheet where the response is saved

By default, the response is saved in the very first sheet of the document. However, you can specify which sheet to save the response in by putting the name of the sheet as the value of the post-sheet-name setting. For example, #! post-sheet-name = Sheet2 would save the response in Sheet2.

Full documentation: Send responses

Read data from Google Sheets

Please note, a Google Sheet that has been published to the web can essentially be read by anyone. This is totally fine as long as it contains data that you want to make public. In general, it is highly recommended that you use one sheet for saving form responses, and another sheet for reading data.

You can also easily prepare a Google Sheet so that your forms and pages are able to read its data and use it on the template. In order to do this, go through the following steps:

  • Open the Google Sheet

  • Click on File -> Share -> Publish to web from the top menu

  • A modal will open up: select the sheet you want to publish and change Web page to Comma-separated values (.csv) or Tab-separated values (.csv)

  • Click on Publish and confirm the action

  • Copy the URL that is shown on the screen

All you need to do now is set this URL in the #! get-url = {url} setting. If you're reading TSV, then also set #! get-format = tsv.

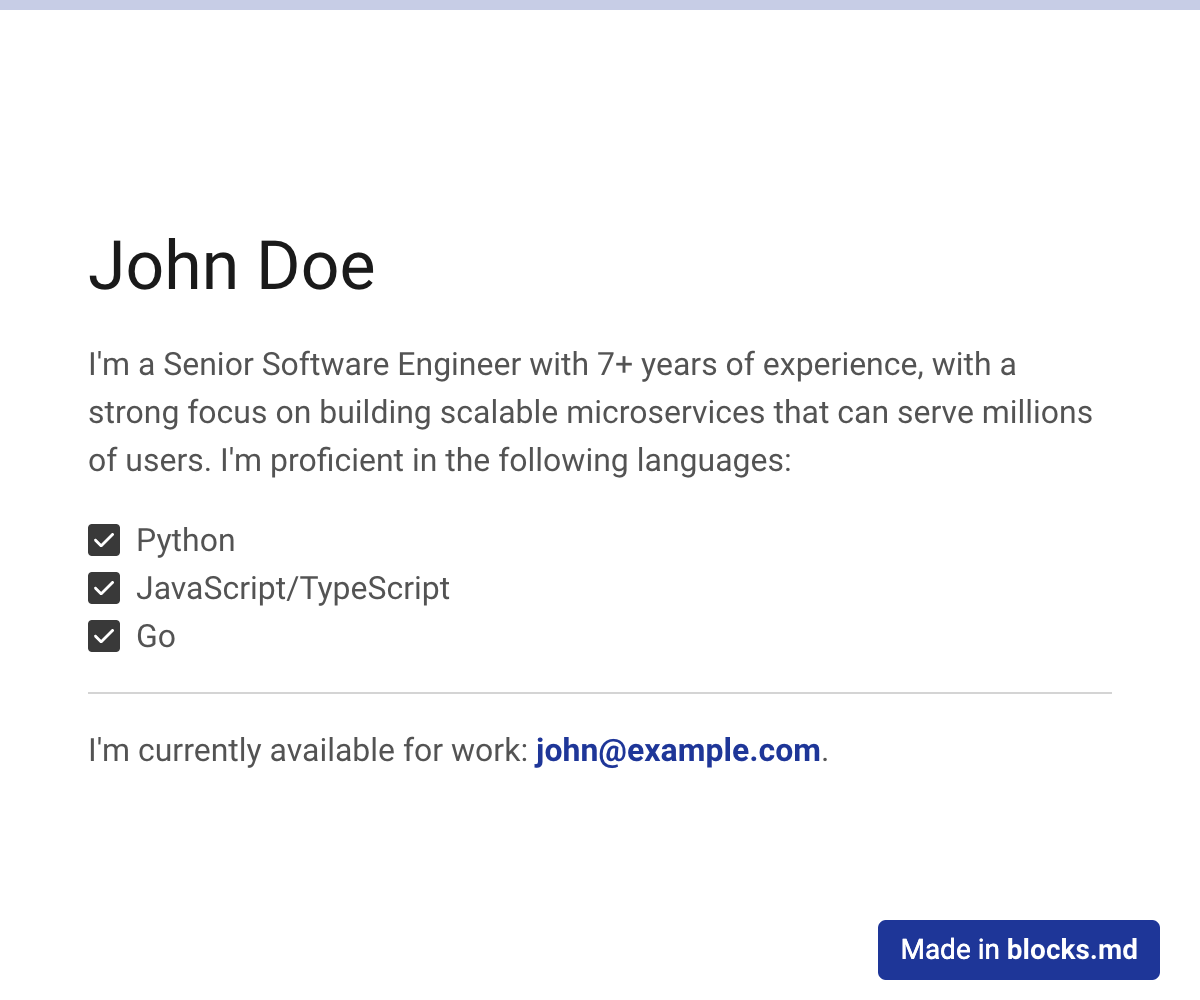
For example, here's a Google Sheet we want to read:

#! get-url = https://docs.google.com/spreadsheets/d/e/2PACX-1vTKJSALN8U91YSqvQZ6bQf24z0okzMM2J9D2VtptW2eASFbIC9dKyj2SlSpeaozczNR-u15mfpHqjuV/pub?gid=0&single=true&output=csv
#! page = single

``` data
{
  "name": "John Doe",
  "email": "john@example.com"
}
```

# {{ name }}

I'm a {{ A3 }} with {{ C3 }}+ years of experience, with a
strong focus on building scalable microservices that can
serve millions of users. I'm proficient in the following
languages:

- [.list-unstyled]
- [x] Python
- [x] JavaScript/TypeScript
- [x] Go

---
{% if D3 -%}
  I'm currently available for work: {{ email }}.
{% else -%}
  I'm currently not available for work.
{% endif %}

Full documentation: Set and read data

Last updated